In Microsoft’s License terms they will allow you to Downgrade Windows 8 to Windows 7 but unfortunately it has to be the Professional version. So you will need;
Windows 8 Professional Key (more about this later)
The most important thing to do is to find your product key, with windows 7 this used to be a sticky lable on the bottom of your laptop/computer, now they it’s imbeded into your laptop which you can’t physically see. This is great when installing windows 8 because it automatically finds the key and activates! but when downgrading to windows 7 this can be a pain. To find your windows 8 key you have a couple of free options see here;
Make sure you keep your product key in a safe place, if everything goes wrong and you want to revert back to windows 8 you will need this key.
Do your Driver Homework
This next step is equally important, you will need to find out if you hardware supports windows 7. For this you will need to visit the manufactors website and check out the drivers – for todays example i am using a Lenovo Ideapad U310 UltraBook.
As you can see from the screenshot below the laptop was purchased for windows 8 pro but DOES support windows 7. I have downgraded a few windows 8 pro laptops recently and the wireless driver was the one i had the most problems with so just triple check it clearly has one like below.
Backup!
Please backup all your music, documents, pictures, movies, favourites, and any program license keys! the next step is where we wipe everything!
Change UEFI Settings and Enable Legacy Boot
Next, we need to change the bios settings, please follow my instructions as booting straight into the bios by pressing the del key, will for some unknown reason make windows 7 crash during installation. So first hover to the bottom right corner and open up the charms bar and click on the gear icon.
Click Change PC Settings at the very bottom, then into general on the left hand side, scroll to the bottom on the right hand side and click Restart now underneath Advance Start Up.
This will open up a blue screen, select troubleshoot, advanced options, then select UEFI Firmware settings, then restart.
This will open up your bios screen, in the advanced settings part of this screen you may have a few different options and is really down to how the bios is written, take a look at these examples that it could be;
Enable Legacy boot from UEFI boot
Disable UEFI boot.
Disable Secure Boot
In my case i had to change the boot mode, see below.
Installation and Activation
While you’re in the bios change the boot order either USB, CD/DVD, or Network and save settings then reboot. After you have installed windows 7 with ALL!!! Drivers, it is the time to activate. For this you will need to click on windows activation, click on the telephone activation and you will need to speak with an advisor. Tell them you have windows 8 pro and you are downgrading to windows 7 pro, give them your key over the phone and they will convert it into the numeric id that you will need to enter into the activation box and this will give you the fully genuine actvated version of windows 7 and we are done!
PLEASE NOTE every time i have phoned windows for telephone activation a couple of the call centre people did not know what i was on about and they said i can’t do it, i had to put the phone down and re-dial until somebody knew what to do.
At our Lytham computer shop, we had a laptop (Fujitsu Siemens Amilo Pro) in with a bothersome little bug. It’s a common bug in vista for this particular model.
Launch Manager
First of all the wireless would not work at all, it would not find any wireless networks but would look as if the driver was installed. This was due to a little piece of software called the ‘launch manager’ not being installed. So the FN + F1 button would not work.
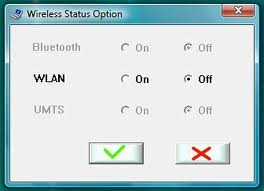
Once that was working, we were hit in the face with another problem! You have to press FN + F1 every single time you start the laptop!? Just to bring up the Wireless Status Option.
Anyway to cut to the chase, this fixed it.
Open up Notepad, copy and paste this:
Set WshShell = WScript.CreateObject(“WScript.Shell”) Set oExec = WshShell.Exec(“C:\Program Files\Launch Manager\WisWBSet.exe”) do while WshShell.AppActivate(“Wireless Status Option”)=False WScript.Sleep 100 loop WScript.Sleep 100 WshShell.sendkeys(“{TAB}{TAB}{LEFT}~”)
2. Save this file as “<somename>.vbs” somewhere on your harddisk (pref Documents)
3. Copy a short cut and drag it into your “Start Menu / Programs / Startup” to ensure it starts automatically when rebooting.
BT and other competitors are taking orders for Fibre optic broadband in the Fylde Area.
BT have been upgrading the Exchanges in rapid time and on schedule. Some orders for our clients have already been carried out last week! The cost of the upgrade is a massive £2.5 billion from BT which aims to cover two-thirds of the all UK homes and Business by 2015.
Oh Lancashire is wonderful! Now with Fibre Optic Broadband
The first areas to start accepting orders are St Annes, Poulton, Cleveleys and Fleetwood. So call your supplier now and Demand Fibre Optic!
Next up will be Lytham St Annes and Great Eccleston by the end of September This Year!
By the end of 2013 the center of Blackpool and Kirkham
By the end of 2014 North Shore, South Shore, Marton, Freckleton, Hambleton, Knott End and Pilling
and finally by the end of 2015 Weeton (Sorry Guys!)
Click the Map
How Fast, is fast?
Some say fibre optic broadband is so fast that when you turn your light out, you can be in bed before it gets dark!
To give you an idea on how fast fibre optic broadband is, see the table below.
FTTP (Fibre To The Premises) this is the faster option out of the two, it’s a full fibre based product from the exchange to your home with speeds from 100mb download and 30mb upload. Unfortunately for us in st annes and lytham we will only be getting, FTTC (Fibre To The Cabinet). This is fibre from your exchange up to the green cabinets in the streets. (the BT Chaps sitting on little stools are always at them!) Then from the green cabinets, a black copper wire from the telephone poles into your home. I am not complaining though! Honest! the FTTC speeds are up to 80mb download and 20mb upload. Hurray!
We recently had a problem with a clients Mac Book / Outlook 2011 / Microsoft Exchange / Server 2008.
Since the internet cut of at their main office outlook 2011 and mac mail both were acting strangely. Outlook 2011 would say Downloading 1/7000 items, it would complete but the inbox would be completely blank and the process would start again. Mac Mail would download a few emails from a previous year but just randomly stop and no more emails would download.
After many many work hours. We finally Cracked it!
On the exchange server.
Click Start, click All Programs, click Accessories, right click Command Prompt and click Run As Administrator.
Change Directory to <root drive>\Windows\System32, the root drive is typically C:. Run the following command lodctr /R This will restore the base or core counters
Check the registry value under HKLM/Software/Microsoft/WindowsNT/CurrentVersion/Perflib/009and ensure that the value Counter is no longer corrupted.
In the Command Prompt window, run the following command: wmiadap /f
This will force the reload of all counters in to the WMI repository.
Open Performance Monitor (perfmon.exe) and click the green + to Add,this will open Add Counters. Verify that the MSExchange counters exist and have Instances populated.
We popped in the details of the exchange account to a Windows 7 Pro machine and it was fine – this ruled out the server.
We re-created identities on the mac, we installed every email client under the sun for mac including entourage, mac mail, thunderbird all with different but similar problems – it had to be the mac!
We re-installed outlook 2011, we deleted every single text file, document and folder to do with Microsoft and Office on the mac!? In the end we created a virtual machine with Mac OSX on so we could break it as much as we wanted and revert the changes – just so we didn’t have to break the clients mac book completely. When we created the virtual machine with a fresh installation of Mac OSX, it had the same problem – it had to be the server!
This went on for nearly 2 weeks! Hours spent crawling forums and Googling. Every bit of spare time throughout the work day was back on this with trial and error.
I still cant believe that a performance monitor can stop email going to blackberry and mac devices!?
Anyway hope this blog saves you all the hours i spent on it.